Migrating from Exchange Server 2010 to Office 365 (Microsoft 365) is one of the most important steps organizations take to modernize their communication and collaboration platforms. Exchange 2010 reached its end of support in October 2020, meaning no security patches, bug fixes, or technical support from Microsoft. This makes migration not only an upgrade but a necessity to maintain business continuity and compliance.

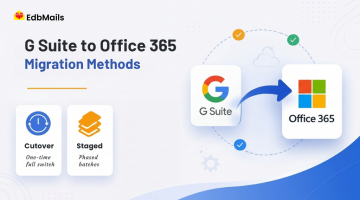
While Microsoft provides several methods to migrate to Office 365 (Cutover, Staged, Hybrid, and IMAP migrations), Cutover Migration is often the first method many organizations consider due to its simplicity. However, it comes with limitations that IT teams must plan for.
In this article, we’ll cover:
- What cutover migration is and how it works
- Step-by-step cutover migration from Exchange 2010 to Office 365
- Pre-requisites and best practices before migration
- The limitations and challenges of cutover migration
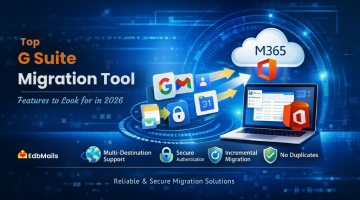
- Why EdbMails Exchange Migration Tool is a better alternative for secure, scalable, and zero-downtime migrations
What is Cutover Migration?
Cutover migration is a Microsoft-supported method where all mailboxes, Calendars, and contacts from Exchange 2010 are migrated to Office 365 in one batch operation.
Key highlights:
- Supported Exchange versions: 2003, 2007, 2010, and 2013
- Maximum supported mailboxes: 2,000 (though performance issues arise beyond 150–200 mailboxes)
- Duration: A few days, depending on network speed and mailbox size
- Users are switched over to Office 365 immediately after migration
This method is recommended for small to medium-sized businesses that can handle a ‘big bang’ cutover where all users transition at once.
👉 Want to avoid the risks of downtime? Try EdbMails Exchange Migration Software
Pre-Requisites and Best Practices for Cutover Migration
Before starting migration, you should prepare both on-premises Exchange and Office 365 environments.
- Check Licensing and Subscriptions
- Ensure your Office 365 subscription includes Exchange Online mailboxes.
- Purchase enough licenses to match the number of users being migrated.
- Ensure your Office 365 subscription includes Exchange Online mailboxes.
- Mailbox Size and Count Assessment
- Export mailbox sizes using PowerShell (Get-MailboxStatistics) to estimate migration time.
- Consider splitting large mailboxes to improve performance.
- Export mailbox sizes using PowerShell (Get-MailboxStatistics) to estimate migration time.
- Network and Bandwidth Requirements
- Test your internet bandwidth to ensure it can handle mailbox data transfer.
- Microsoft provides the Exchange Online Network Performance tool.
- Test your internet bandwidth to ensure it can handle mailbox data transfer.
- Update Exchange Server
- Install the latest service packs and cumulative updates for Exchange 2010.
- Install the latest service packs and cumulative updates for Exchange 2010.
- Backup Strategy
- Keep offline copies of EDB files as a fallback (EdbMails can migrate from EDB files directly).
- Keep offline copies of EDB files as a fallback (EdbMails can migrate from EDB files directly).
- Communication with End Users
- Inform employees about downtime and new login steps post-migration.
- Provide training resources for Outlook Web App and Office 365 apps.
- Inform employees about downtime and new login steps post-migration.
Step-by-Step Cutover Migration from Exchange 2010 to Office 365
1. Add and Verify Your Domain in Office 365
- Log into the Microsoft 365 Admin Center.
- Navigate to Setup > Domains > Add Domain.
- Enter your domain (e.g., yourcompany.com).
- Add the TXT/MX record provided by Microsoft to your DNS host.
- Once verified, Office 365 recognizes the domain and is ready for mailbox migration.
Tip: Perform domain verification well in advance to avoid DNS propagation delays.
2. Prepare the On-Premises Exchange 2010 Environment
Enable Outlook Anywhere (RPC over HTTP)
- Navigate to Server Configuration > Client Access in EMC.
- Enable Outlook Anywhere for external connections.
Configure SSL Certificates
- Use a trusted CA certificate with Autodiscover and Outlook Anywhere included.
Assign Permissions
- Ensure the migration account has FullAccess and Receive As rights.
Disable Unified Messaging
- Temporarily disable it to avoid conflicts.
Create Security Groups
- Pre-create empty mail-enabled groups in Office 365 to match existing ones.
Clean Up Mailboxes
- Remove delegates or references to non-migrated objects.
3. Create a Migration Endpoint
The migration endpoint establishes connectivity between Exchange 2010 and Office 365.
Steps:
- In Office 365 EAC, go to Recipients > Migration > More (…) > Migration Endpoints.
- Choose Outlook Anywhere.
- Provide admin credentials.
- Test and save the connection as a Migration Endpoint.
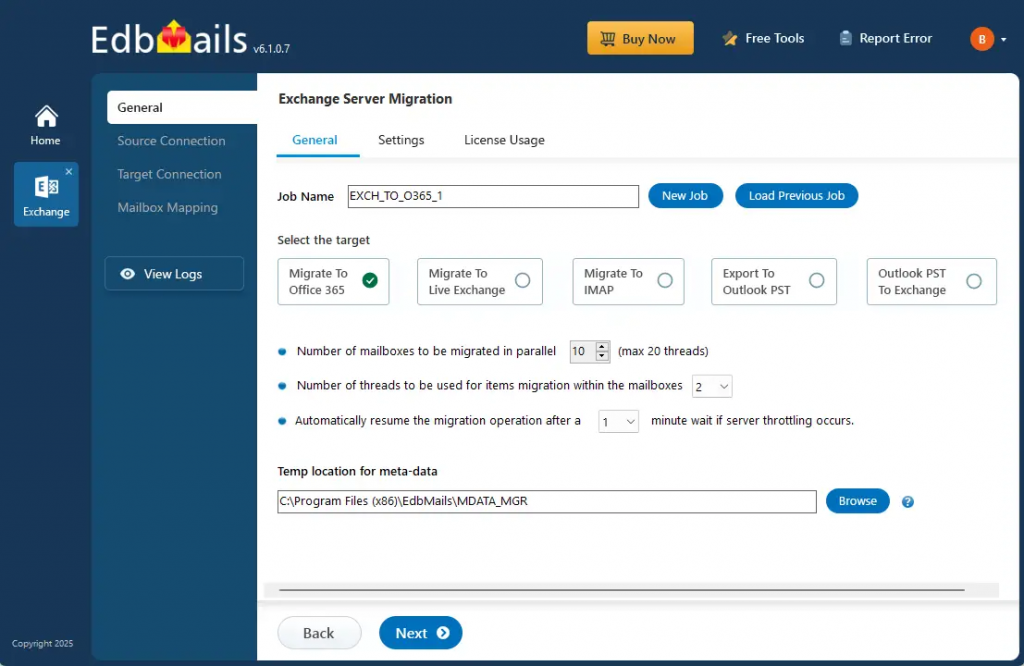
4. Start a Cutover Migration Batch
- In EAC, navigate to Recipients > Migration > Add (+) > Migrate to Exchange Online.
- Select Cutover Migration.
- Specify the Migration Endpoint created earlier.
- Name the batch and start it.
During migration:
- Mailbox data syncs to Office 365.
- Progress is shown as Syncing and completes with Synced status.
5. Post-Migration Tasks
Convert On-Premises Mailboxes to Mail-Enabled Users
- Prevents Outlook from pointing to old Exchange.
Update DNS Records
- Update MX and SPF records to route email to Office 365.
Assign Licenses
- Assign Office 365 licenses to migrated users (mandatory to keep mailboxes active).
Remove Migration Batch
- Delete the migration batch once all mailboxes are functional in Office 365.
Limitations of Cutover Migration
While simple, cutover migration is not always the best choice:
- Mailbox Limit: Hard limit of 2,000 (practical limit ~150).
- No Incremental Sync: Any changes after migration batch start are not synced.
- Downtime: All mailboxes switch at once.
- Complex Setup: Requires SSL, permissions, DNS, and manual steps.
- Limited Control: Cannot filter by date, folder, or selectively migrate users.
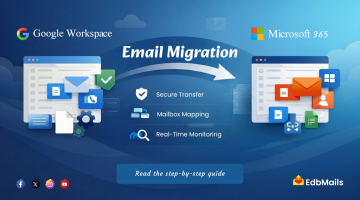
How EdbMails Simplifies Exchange 2010 to Office 365 Migration
EdbMails Exchange Migration Tool eliminates these challenges by offering a direct, secure, and flexible migration path.
Key Advantages:
- Direct Migration Across Versions
- Migrate from Exchange 2010 directly to Office 365 with an easy to use graphical user interface.
- Migrate from Exchange 2010 directly to Office 365 with an easy to use graphical user interface.
- Unlimited Mailbox Migration
- No hard limit like cutover’s 2,000 mailboxes.
- No hard limit like cutover’s 2,000 mailboxes.
- Concurrent Migration
- Migrate multiple mailboxes in parallel to save time.
- Migrate multiple mailboxes in parallel to save time.
- Incremental Migration
- Only new or modified items migrate after the first sync.
- Only new or modified items migrate after the first sync.
- Granular Migration
- Migrate specific mailboxes, folders, or filters by date.
- Migrate specific mailboxes, folders, or filters by date.
- Zero Downtime
- Users keep working while migration runs.
- Users keep working while migration runs.
- Secure and Compliant
- OAuth 2.0, TLS, and SSL encryption.
- OAuth 2.0, TLS, and SSL encryption.
Cutover Exchange 2010 to Office 365 Using EdbMails
If you’re planning a cutover migration from Exchange 2010 to Office 365, EdbMails provides a straightforward way to make the transition smooth and reliable. Instead of relying solely on the manual native method, you can simplify the entire process and ensure business continuity with an automated approach.
👉 Read the step-by-step guide for Exchange 2010 to Office 365 Migration
Conclusion
Cutover migration offers a straightforward path from Exchange 2010 to Office 365, but it’s best suited for smaller organizations with limited mailboxes. Its limitations in scalability, downtime, and lack of incremental sync make it less practical for larger or growing businesses.
For a faster, more reliable, and scalable migration, EdbMails Exchange Migration Tool provides a modern alternative with advanced features like concurrent mailbox migration, incremental sync, and zero downtime.
👉 Get started today with a Free Trial of EdbMails and experience a seamless Exchange 2010 to Office 365 migration.