An OST (Offline Storage Table) file is a local copy of your Exchange mailbox stored on your computer, enabling you to work offline. Any changes made while offline are synchronized with the Exchange server once the connection is restored. OST files remain unaffected by Exchange server failures, making them valuable for mailbox data recovery in such situations. However, since OST files are tied to the original Outlook profile, converting them to PST format is often necessary to access the data outside the original environment.
Reasons to Convert an OST to PST File
- Recover deleted mailbox items – Convert OST files to PST to retrieve accidentally deleted emails, contacts, calendars, and other important mailbox data.
- Backup and restore mailboxes – Generate PST backups from OST files for quick and reliable restoration of individual Exchange mailboxes in cases of data loss, corruption, or profile issues.
- Archive and optimize large OST files – Convert oversized OST files (20GB–100GB+) into PST format to enhance Outlook performance and reduce storage usage on the Exchange server.
- Access data on different systems – Convert OST to PST to open and use mailbox data on any Outlook profile or computer, removing dependency on the original system and account.
- Streamline migrations and upgrades – Use PST files to transfer mailbox data between Exchange servers or migrate to Office 365 while ensuring complete data integrity.
- Maintain business continuity – Keep essential mailbox data available during server downtime, planned maintenance, or unexpected outages to avoid workflow disruptions.
There are several methods to export an OST file to PST, provided you can log in to Outlook with the corresponding Exchange mailbox profile. Below are Microsoft’s native techniques for converting an OST file to PST:
Export OST to PST using Microsoft Outlook’s Export feature
You can convert an OST mailbox to a PST file directly from Outlook, as long as you can access the mailbox through its original Exchange profile.
To convert the OST to a PST file, follow these steps:
- Open Microsoft Outlook and sign in with the Exchange mailbox account associated with the OST file.
- In Outlook, go to the File tab, select ‘Open & Export’, and then click ‘Import/Export’ to open the Import and Export Wizard.

- Select ‘Export to a file’ and click ‘Next’.

- Select ‘Outlook Data File (.pst)’ and click ‘Next’.

- Select the mailbox or folder you want to export, then click ‘Next’.

- Browse to select the destination location for the PST file, and click ‘Finish’.

Enable AutoArchive to export OST file data to PST
When enabled, Outlook will move items from the OST file into a separate PST file based on the archive settings you configure.
Steps to archive OST data into a PST file:
- Open Outlook, go to the File tab, select ‘Options’, navigate to ‘Advanced’, and click ‘AutoArchive Settings’.

- Choose how often (in Days) you want AutoArchive to run, select the destination folder to save the archived PST file, configure the archive settings, and click OK.
With these settings, the mailbox items from your OST file will be automatically archived and saved to the specified PST file.
Export an Orphaned OST to PST using EdbMails
When Outlook can’t connect to the original Exchange profile or server—or the OST is unusable—you can still extract the mailbox by converting the OST to a PST file.
EdbMails OST to PST Converter lets you open orphaned or inaccessible OSTs, preview items, and export selected folders or entire mailboxes to PST while preserving the original structure, metadata, and Unicode content. It also supports large files, selective export (date/subject/from), and optional PST splitting.
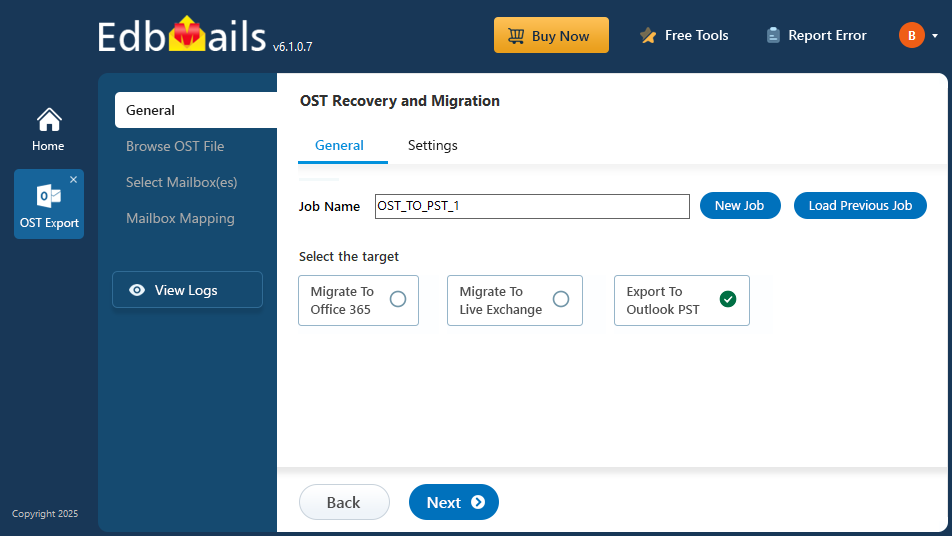
- Download & Install EdbMails on your system.
- Select the OST to PST Converter option.
- Add the offline OST file to the application.
- Choose the mailboxes or items you want to export.
- Click the ‘Start Export’ button to initiate the OST to PST conversion.
- Open the PST file in Outlook to access your data.
Conclusion
Converting an OST file to PST is essential for scenarios such as recovering deleted mailbox items, creating backups, managing large mailboxes, or accessing data on a different system. Microsoft Outlook offers native methods like the Export feature and AutoArchive, which work well when you can access the original Exchange profile.
However, in cases where the OST is orphaned, inaccessible, or corrupted, a specialized tool like EdbMails OST to PST Converter ensures a quick and reliable conversion while preserving data integrity and folder hierarchy. Whether for recovery, migration, or backup, these methods help maintain uninterrupted access to your mailbox data and support smooth business operations.
See More
How to migrate OST to Office 365 using EdbMails?
How to perform OST to Exchange migration using EdbMails?