You can convert Regular mailboxes to Shared mailboxes and Shared mailbox to Regular mailbox in the Office 365 admin center. Shared mailbox is a type of Regular mailbox but it doesn’t have its own user name and password. When you convert a Shared mailbox to a Regular mailbox, the mailbox can be accessed only by a single user. It will then become a private mailbox.
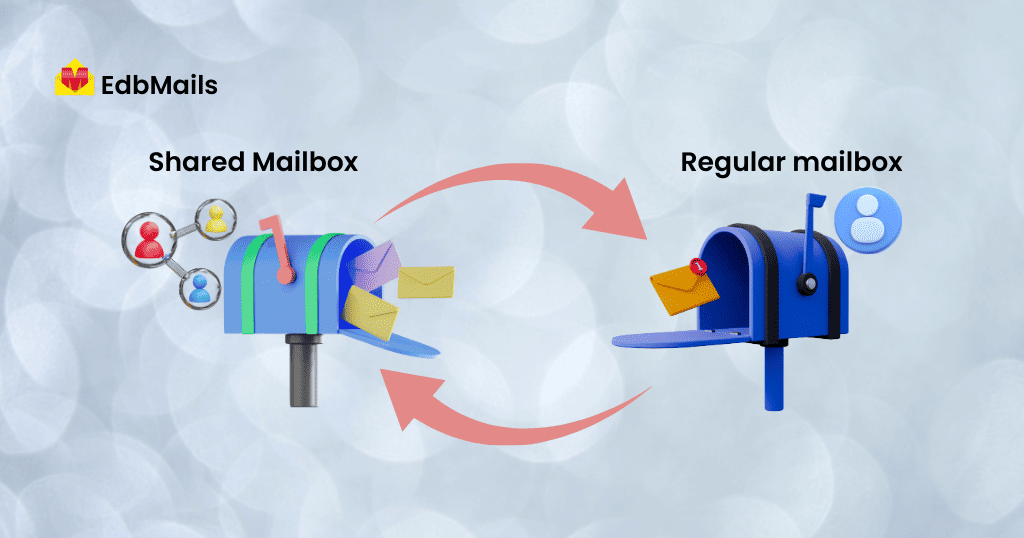
The existing mail items, calendar events, contacts will be retained when you convert a user’s mailbox to a Shared mailbox. In this case, you can add members to the Shared Mailbox to access the information. Instead of data being accessed by a single user, several people can access the same mailbox items. Mail items can be accessed in the member’s Outlook account by adding a Shared mailbox to their Outlook profile.
The benefits of a Shared mailbox
- You can send mails on the behalf of the group’s common mail address.
- Possible to have shared calendars without contacts, tasks, etc.
- Group members can choose their inbox notifications settings.
- Receive mail from inside and outside of the company
Some of the important things you should know
- A Regular mailbox that you are converting needs a license before you convert it to a Shared mailbox. Otherwise you don’t get an option to convert the mailbox. After converting to Shared mailbox, you can remove the license because Shared mailbox does not require a license except for a few cases.
- Shared mailbox can have up to 50 GB of data without having a license. To store more than that, you need a license assigned to it.
- The rules will not change even after the mailbox is converted to a Shared mailbox.
Steps to convert Regular mailbox to Shared mailbox
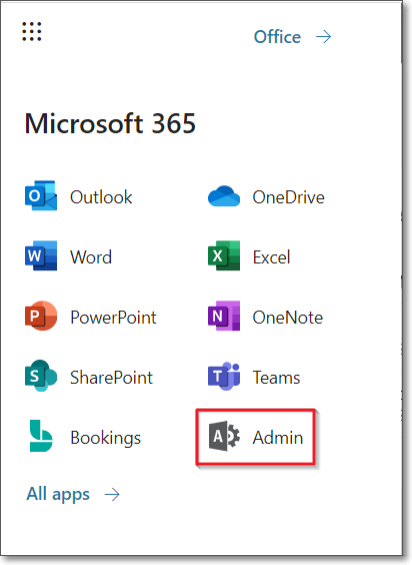
Step 1 : Login to Office 365 account and click on ‘Admin’ to open Office 365 Admin center.

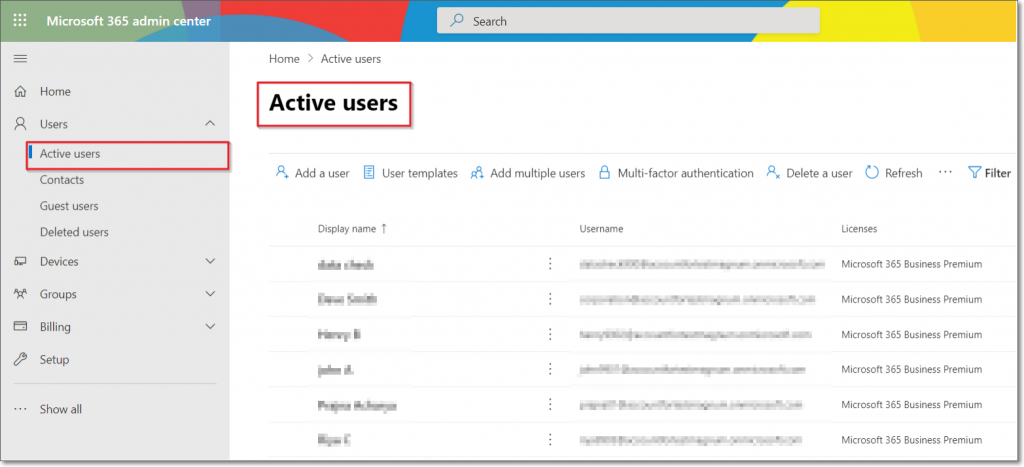
Step 2 : In Office 365 admin center, expand ‘Users’ and choose ‘Active users’.
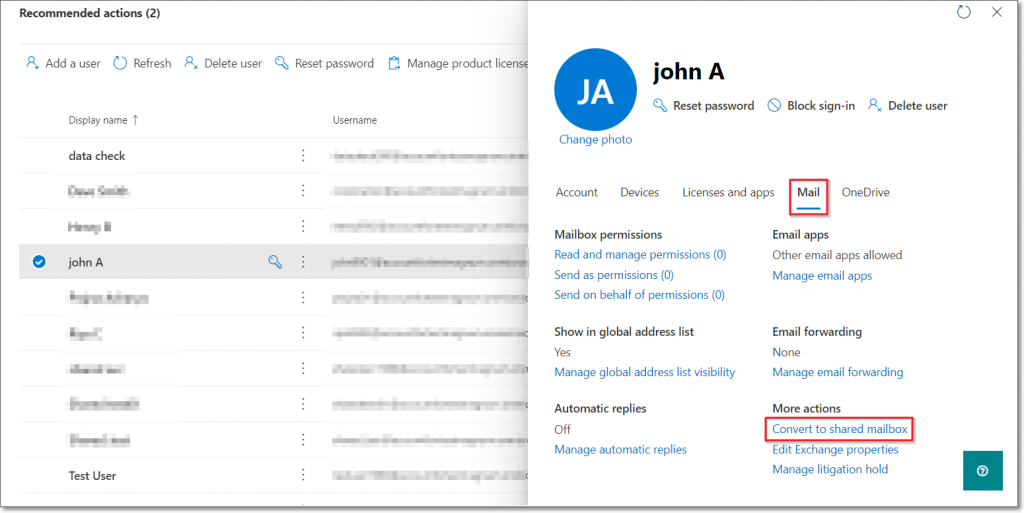
Step 3 : Select the user whose mailbox you want to convert to a Shared mailbox, then go to ‘Mail’ and select ‘Convert to shared mailbox’ under More actions.
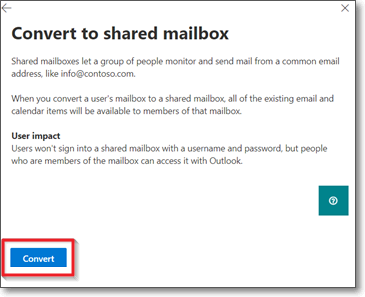
Step 4 : Now click the ‘Convert’ button.
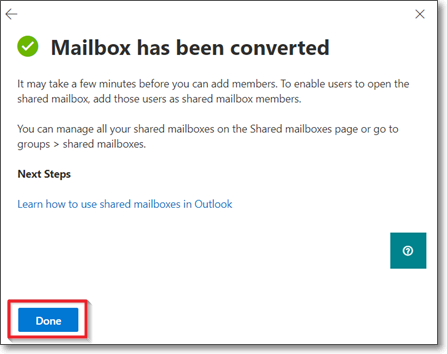
Step 5 : You will get a message like ‘Mailbox has been converted’. Click on ‘Done’.
Steps to convert Shared mailbox back to a regular mailbox
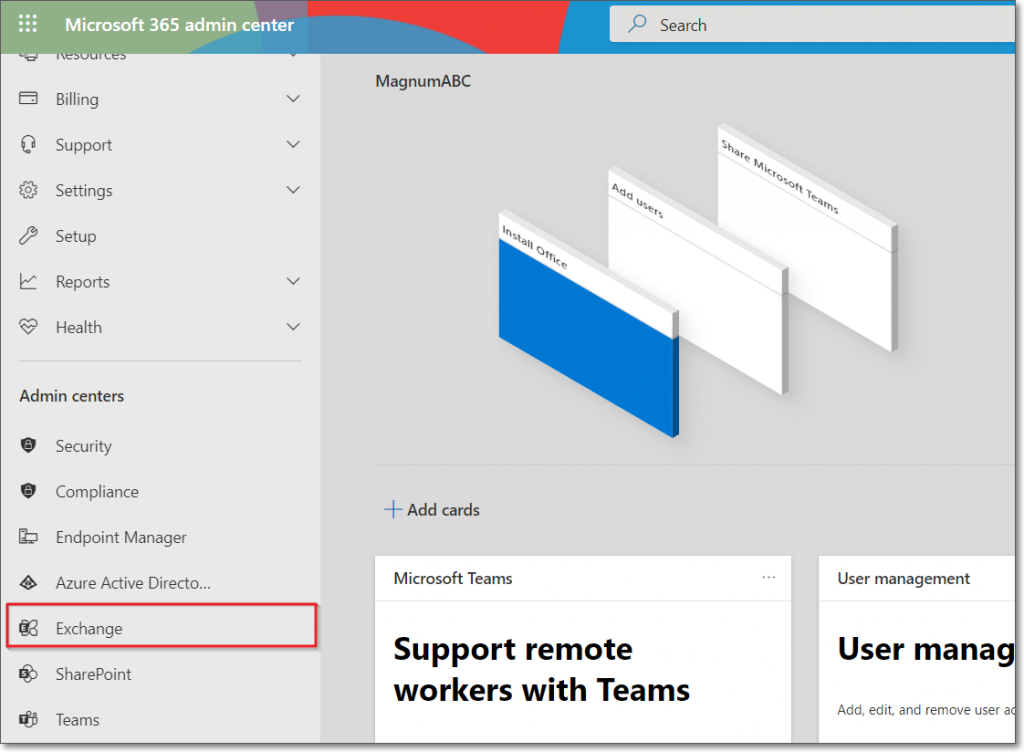
Step 1 : Login to Office 365 admin account. Then click the ‘Admin’ gear icon.
Step 2 : In Office 365 admin center, select ‘Exchange’ to open Exchange admin center.
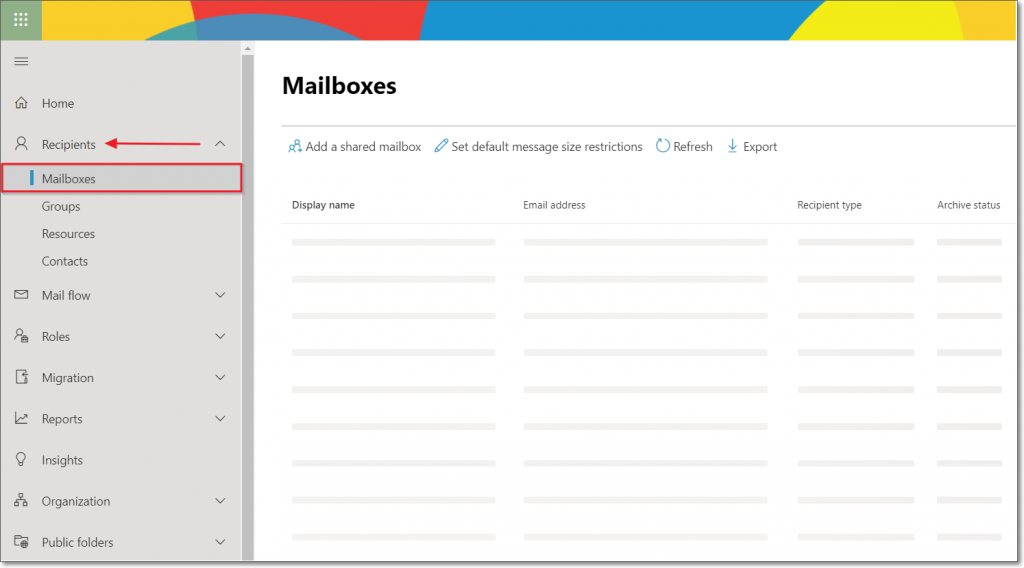
Step 3 : In Exchange admin center, select ‘Mailboxes’ under Recipients.
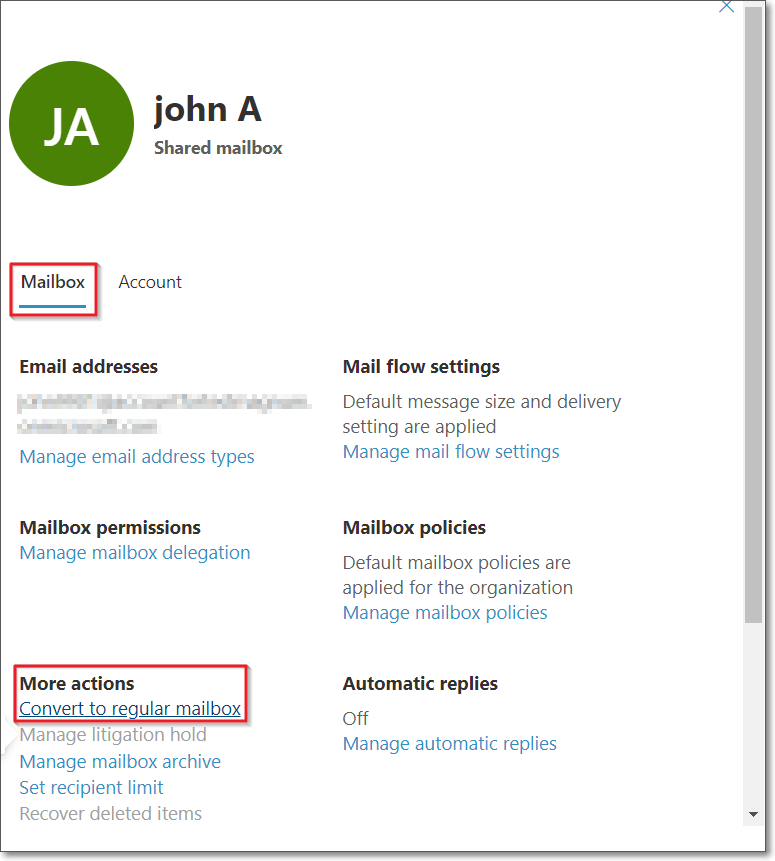
Step 4 : Select the Shared mailbox that you wish to convert to a regular mailbox. Inside ‘More Actions’ you can see the option ‘Convert to regular mailbox’, click on that.
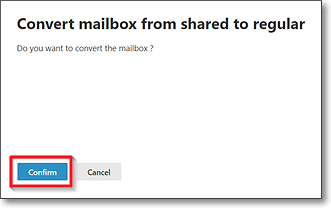
Step 5 : Now click on ‘Confirm’ to convert from regular mailbox to shared mailbox.
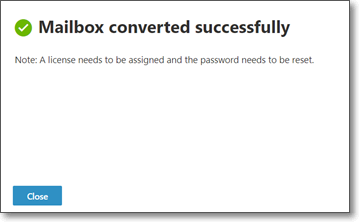
Step 6 : You will get message ‘Mailbox converted successfully’. Click on ‘Close’.
Do you know about EdbMails migration and backup tools
EdbMails Office 365 migration software is internationally recognized software that provides simple ways to perform Migration/Export/Backup operations. It assures 100% safe and secure migration operations without any loss of data. EdbMails does not use any other third party tools for these operations.
You can migrate your Shared mailbox items to other Office 365 account/ Live Exchange server. Also you can backup those items to Outlook PST and recover whenever you want.
Some of the features of EdbMails migration tools are
- Supports incremental migration
- Selective items migration
- Automatic mapping of mailboxes
- Creates mailboxes on target server automatically
- Zero downtime
- Exclusive filter options available
- Provides 100% security
For more information please visit https://www.edbmails.com/pages/products.html