Migrating from IMAP to Office 365 Shared mailbox is an essential step for businesses that want to consolidate communication, improve collaboration, and take advantage of the full Microsoft 365 ecosystem. While IMAP servers provide basic email access, they lack advanced features such as centralized administration, advanced security policies, and seamless collaboration tools. In contrast, Office 365 Shared Mailboxes allow multiple users to send, receive, and manage emails from a common address (like support@ or sales@), making them perfect for teamwork-driven environments.
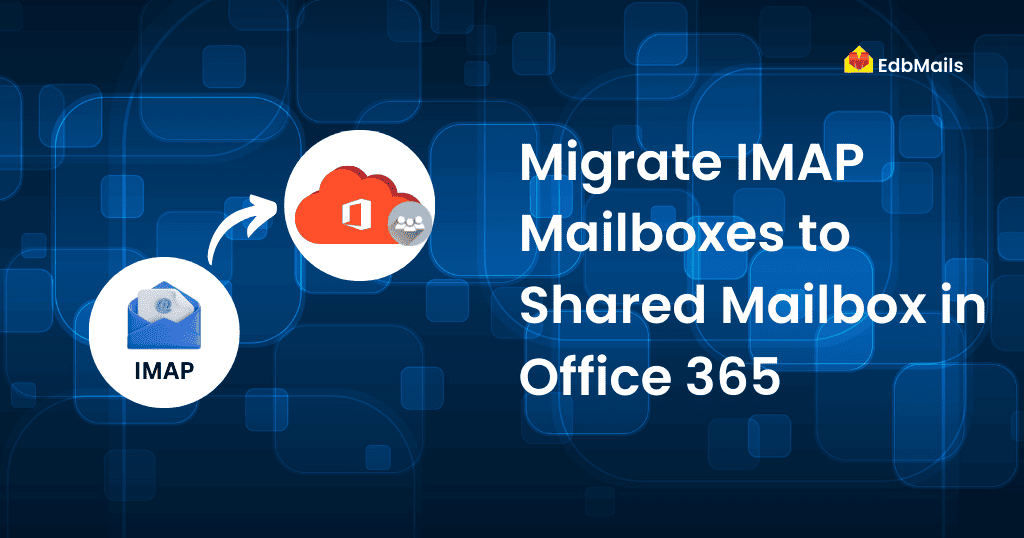
EdbMails IMAP Migration Tool provides a direct, secure, and efficient way to perform IMAP to Office 365 Shared mailbox migration without downtime or data loss. The tool supports all major IMAP-enabled servers, including Gmail, Yahoo, Zoho, Zimbra, and Outlook.com. It preserves email folder hierarchy, metadata, attachments and ensures data integrity. Moreover, EdbMails offers advanced filter options for selective migration and an intuitive interface that even non-technical users can navigate with ease.
The following guide explains planning, prerequisites, detailed migration steps, post-migration activities, and the benefits of using EdbMails for a smooth IMAP to Office 365 Shared mailbox migration.
IMAP to Office 365 Shared mailbox migration planning
Before beginning your IMAP to Office 365 Shared mailbox migration, proper planning is crucial. Consider the following checklist:
- Clean up source mailboxes by removing unused items and duplicates. (You can use EdbMails Duplicate Mail Remover before migration).
- Document user accounts, login credentials, email addresses, DNS settings, MX records, and firewall configurations.
- Estimate the size of mailboxes and data volume for migration.
- Decide between a cutover (all-at-once) or staged migration.
- Create user accounts and assign licenses on Office 365.
- Ensure adequate network bandwidth for migration and account for Office 365 throttling.
- Communicate the migration plan to stakeholders and end-users.
- Perform a pilot migration before the final cutover.
Pre-migration activities for IMAP to Office 365 Shared mailbox migration
On the IMAP source server:
- Collect IMAP server details: hostname, port, username, and password.
- For multiple users, download the sample CSV file from EdbMails and fill in the mailbox details.
- For Gmail accounts, generate an App password instead of using the primary login.
On the Office 365 target server:
- Prepare your Microsoft 365 tenant.
- Purchase or evaluate the appropriate Office 365 plan (Business / Enterprise).
- Create user accounts and assign licenses.
- If migrating to Shared Mailboxes, ensure they are pre-created and permissions are configured (Create Shared Mailboxes).
- Add and verify custom domains on Office 365 (Add a domain to Microsoft 365).
- Configure message size limits up to 150MB.
Steps to migrate IMAP to Office 365 Shared mailbox
Step 1: Install and launch EdbMails
- Download and install EdbMails IMAP to Office 365 migration software.
- Log in with your EdbMails account or start a free trial.
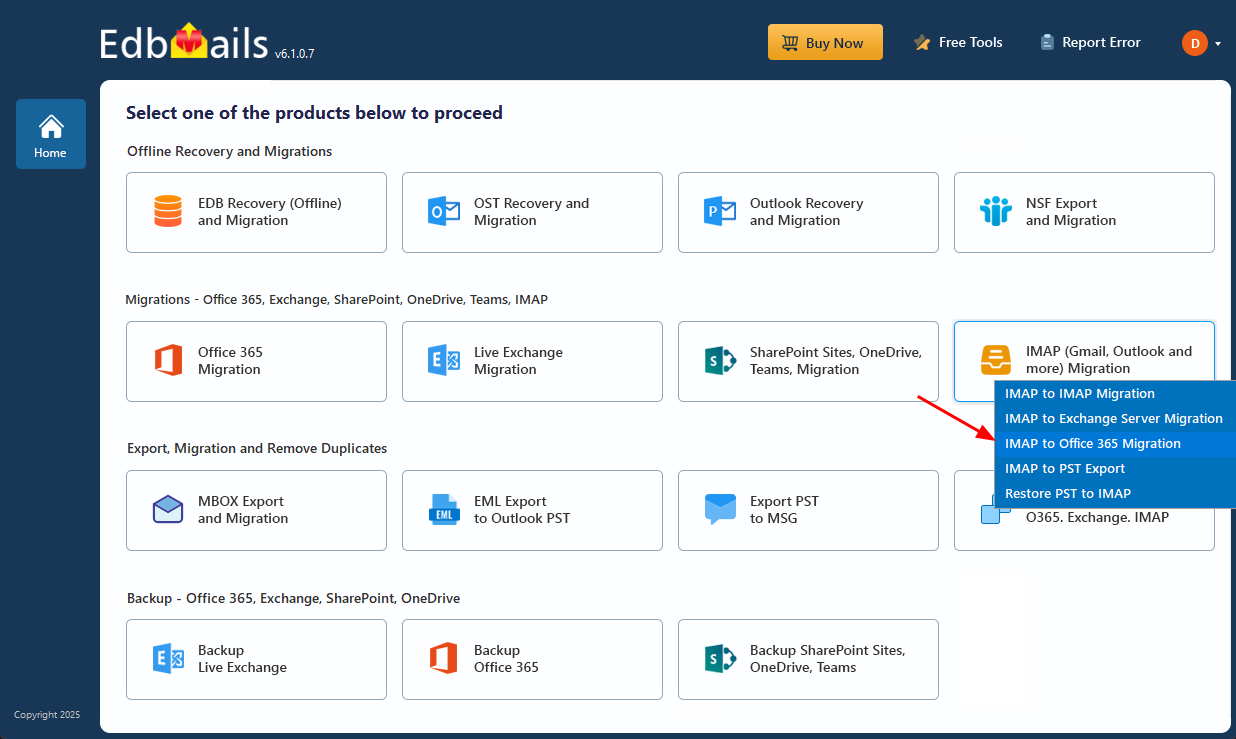
- Select IMAP Migration and then IMAP to Office 365 Migration.
Step 2: Connect to the source IMAP server
- For a single user, select the IMAP server and provide login credentials.
- For multiple users, download the sample CSV file from the software, update and upload the CSV file with all user details.
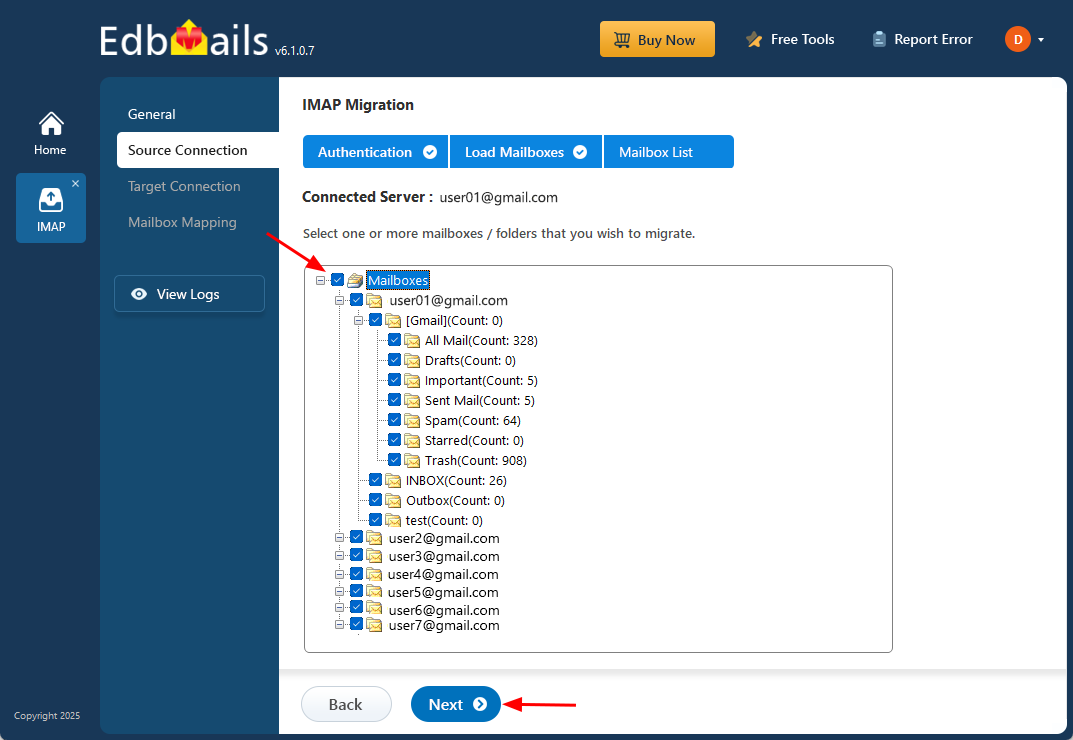
Step 3: Select source mailboxes
- Choose specific mailboxes or folders for migration.
Step 4: Connect to the target Office 365 server
- Add a new connection to Office 365.
- Select Connect to Primary/Shared Mailboxes.
- Authenticate with Microsoft sign-in and load mailboxes (or use CSV for more than 100 mailboxes).

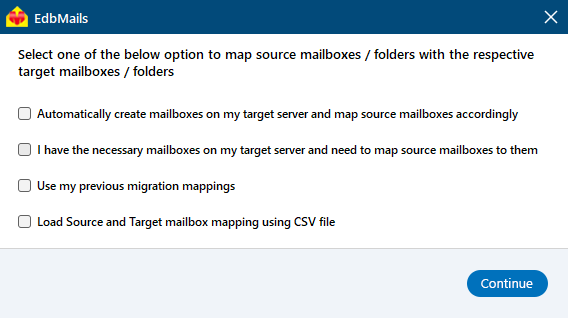
Step 5: Map source and target mailboxes
- Choose the required mailbox mapping option for your migration.
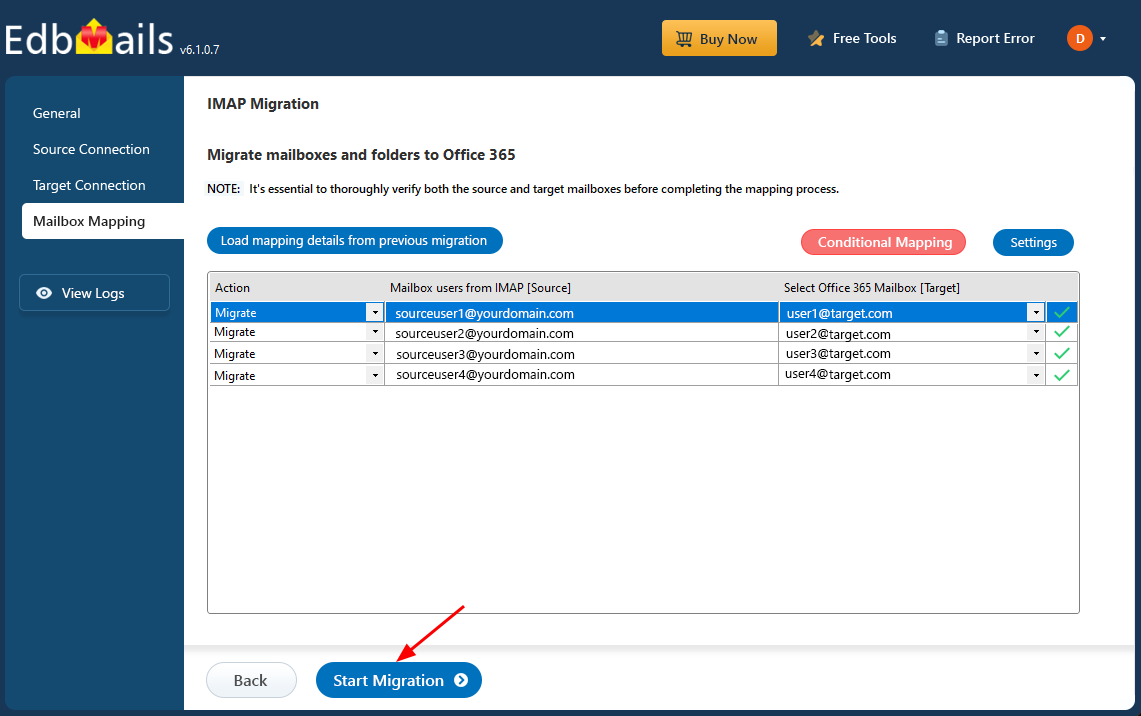
Step 6: Start the migration
- Click Start Migration to begin.
- Monitor real-time progress and view detailed migration reports.
For a more detailed guide, read:- Step-by-Step IMAP to Office 365 Shared mailbox migration
Post-migration activities for IMAP to Office 365 Shared mailboxes Migration
- Update DNS and MX records to point to Office 365.
- Configure Autodiscover records for Outlook connectivity.
- Create or update Outlook profiles for end-users.
- Verify email flow, permissions, and access rights.
- Decommission old servers if not required.
Troubleshooting IMAP to Office 365 Shared mailbox migration
If you encounter errors:
- Check EdbMails Knowledge Base.
- Contact EdbMails 24/7 support.
- Review migration logs for detailed error codes.