Message tracing or message tracking in Office 365 is one of the common tools used by administrators to monitor the email flow direction. When emails travel through Office 365, some of the information about them is put away in logs and accessible for regulatory purposes. Regardless of whether the user deletes or cleanses messages, the head can see fundamental data like sent and received messages.
But this Message tracking does not allow you to look into the message substance. In any case, it can give a considerable amount of information about the emails, like:
- Sender & Recipient
- Send & receive dates
- subject and email size
- Message status and event details. There are seven conceivable qualities in the conveyance status field, like failed, delivered, pending, spam, expanded, unknown, and quarantined.
- Sender IP addresses.
- Message ID is a unique number recognizing a message. In the message trace search, the message ID will be common and displayed once for each recipient when there are multiple recipients. But the message trace ID will be different for each entry.
The message tracking and message tracing are a bit different in Office 365. The message tracking log files are text files, so users can copy and access them directly, and it is also possible to delete them manually.
Differences between Office 365 message tracing & message tracking
| Message Activity | Message Tracking Log | Message Tracing |
| Access Message | PowerShell command alternatively a text editor | PowerShell command and EAC(Exchange Admin Center) |
| Message Size Limitation | The message tracking log file default size is 1000 MB | No size limit in the message tracing |
| Age Limitation | The oldest file data is overwritten by default after 30 days. It can be expanded or reduced | Message trace can be easily accessed for up to 7 days and 90 days for “Historical Search”, where results must be seen only on a downloadable CSV file. |
| Message Availability | All information about messages is accessible when they are sent or received. | Messages under 4 hours old may not be accessible |
| Message Delay | Start search immediately | Searching for messages older than 7 days may take a few hours |
Message tracking benefits:
- Identify email delivery issues and fix
- Monitor the email flow
- Check your email flow rules and it’s working
- Message log file
Message Trace Permissions:
Some of the permissions are required for search in the message trace
- Admin security permission
- Security Reader permission
- View-Only Recipients Permission
- Permission for Compliance Admin
- Data Loss Prevention
All permissions mentioned above are set by default for the “organization management” role group. Office 365 message tracking has two types: the first one is a PowerShell command, and the second one is the EAC (Exchange Admin Center) option.
I. Message tracing in Office 365 using PowerShell
PowerShell can be used to search over message tracking logs on on-premises servers and also trace messages on Exchange Online. Even though it looks similar, there are a few differences. Let’s check those below.
The on-prem Exchange has one cmdlet command to get particular message information:
Get-MessageTrackingLog.
Corresponding Office 365 command for the same is “Get-MessageTrace”.
These cmdlet commands are executed same time, yet while Get-MessageTrackingLog seeks through every current log. You can go back past seven days in the Exchange Online counterpart. A separate cmdlet command is there to search older messages, which start a “historical search”.
No need for any additional parameters for the Get-MessageTrace command to search. If you’re not adding any additional parameters, you can get past the 48-hour message information. Regularly, these provide you with an excess of information for indicative purposes. You can also find out specific email information. To discover the end result for a particular email, you should limit your inquiry.
Get-MessageTrace -RecipientAddress <user’s address> -StartDate 20/07/2017 -EndDate 11/14/2017
This cmdlet demonstrates all the mail flow directed to the user address between the specified dates. If you’re not getting all the required information, then you can change the result format and indicate the information you require, Like Size vise or FromIP.
Get-MessageTrace -RecipientAddress <user’s address> -StartDate 20/07/2017 -EndDate 11/14/2017| Format-list -Property Received,SenderAddress,Status,MessageTraceId
This list gives adequate information to identify the correct message. You can check the message status, like why the message delivery failed. For this, you can use Get-MessageTraceDetail. Rather than finding and replicating the Message Trace ID from the result of the previous cmdlet, try to use it in the pipeline.
Get-MessageTrace -RecipientAddress <user’s address> -StartDate 20/07/2017 -EndDate 11/14/2017 -Status Failed | Get-MessageTraceDetail
Now you can see for what reason the message delivery failed – as a result of a mail flow failure. The running message trace will not give the last one-week email information directly; you need to run Historical Search. When you’re starting to search message information, first run the Start-HistoricalSearch. The mandatory parameters are StartDate, EndDate, ReportTitle, and ReportType (MessageTraceDetail or MessageTrace). Ensure you have likewise indicated the – NotifyAddress field, to get the report when it is prepared. If the – NotifyAddress parameter isn’t defined, the best way to get to the report is by EAC (Exchange Admin Center). Likewise, it is essential to limit the inquiry to incorporate just the information you require, as an authentic hunt may take up to a couple of hours.
II. Office 365 Message Tracking using EAC (Exchange Admin Center)
The on-prem Exchange does not allow message tracking through (EAC) Exchange Admin Center. But in Office 365, you can access message tracing via EAC without any issue. After executing “message trace,” you can view all the results, and also possible to view specific message details. We will see the step-by-step execution of message tracking via the EAC process below.
- Log in to your Office 365 account.
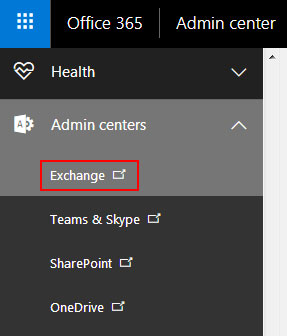
- Next, select the app icon in Office 365 on the left side, in select “Admin”.
- In admin, select the “Exchange”
In the Exchange admin center, click the mail flow, next select the message trace.
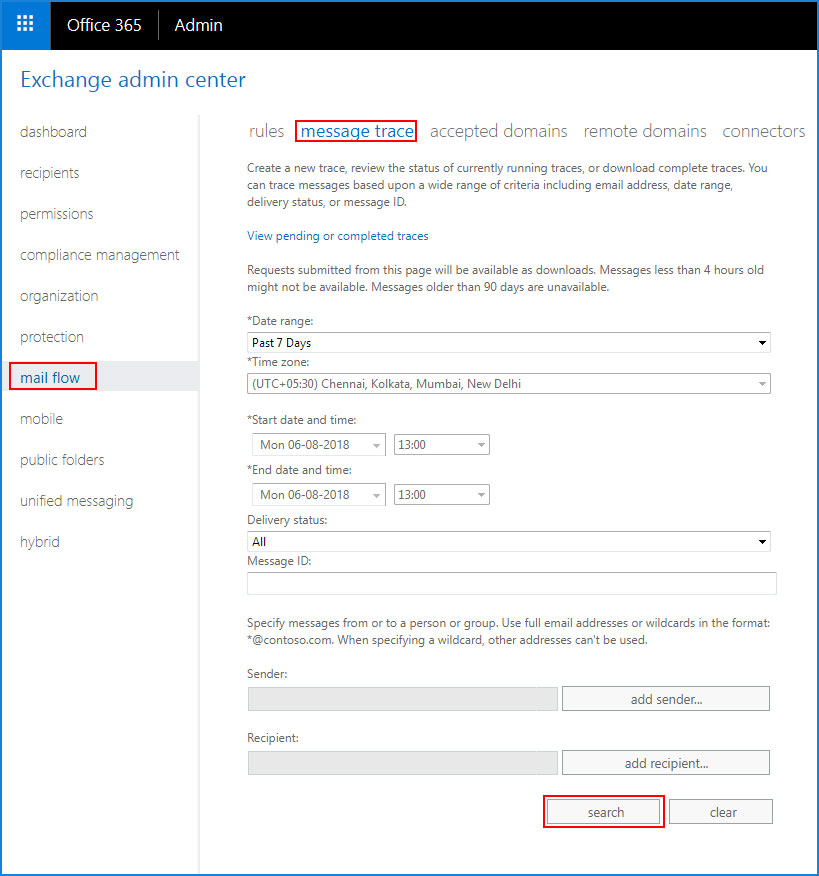
In this window, you can give your input criteria for the information that you expect. You can search past seven days, send and receive email information. First, you need to select custom in the Date range. Then apply Start date & time and End date & time accordingly. This is an older message tracing, like Historical Search. If you want to see past the seven days’ messages, click the “Search” button. One new window will open, in that window mail information will be there.
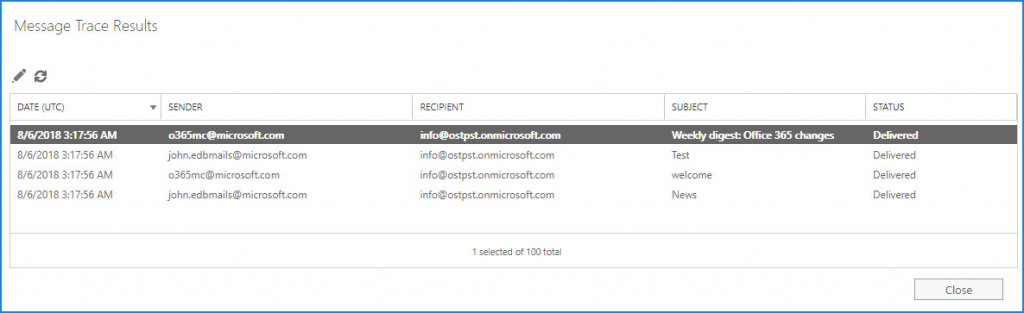
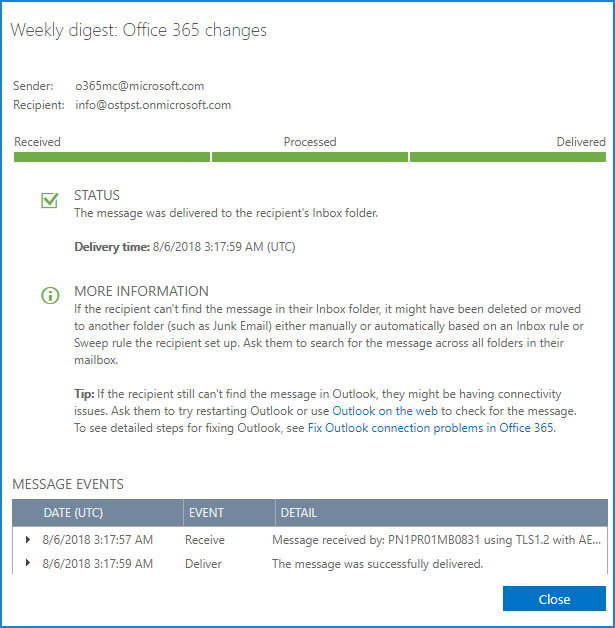
If you want more details of any particular mail, just double-click on the mail, one a pop-up window will open. This window shows all the details, like why message delivered field and message rules. Then you can see which message rules have a problem and you can fix the particular issue.
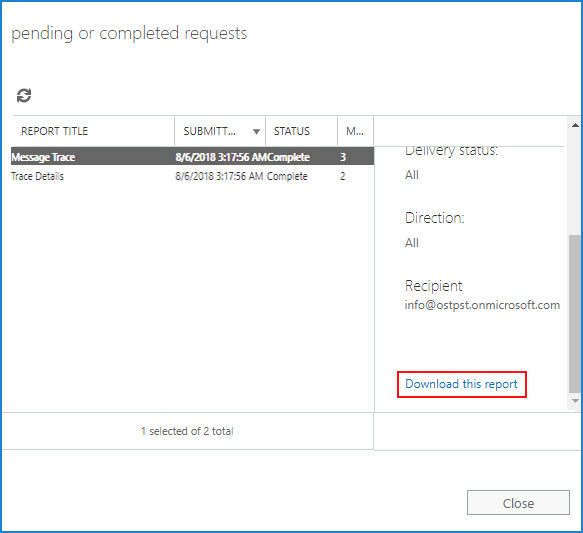
Go back to the main message trace window and click the “View pending or completed trace” And download the “CSV” file with your message report. In the CSV file, each row shows information about a single email.
For upcoming migrations—whether mailbox moves, cross-tenant projects, or phased cutovers—use the EdbMails Office 365 migration tool to automate the process, maintain data integrity, and get detailed migration reports from start to finish. Start your migration with EdbMails today.