Performing a cutover migration from on-premises Exchange to Office 365 can be challenging without the right approach. Using PowerShell, administrators can execute migrations efficiently, maintain control over mailbox transfers, and minimize downtime. The migration duration depends on factors like mailbox size, number of users, and network performance, but a structured PowerShell workflow ensures a smooth, secure, and reliable transition. This article walks you through each step to help businesses migrate mailboxes confidently and maintain productivity throughout the process.

Pre-requisites for Cutover Migration Using PowerShell
Before starting a cutover migration from on-premises Exchange to Office 365 using PowerShell, ensure the following prerequisites are met to guarantee a smooth and secure migration:
- Mailbox Move and Migration Permissions
Ensure the on-premises user account used for migration has the necessary mailbox move and migration permissions to access all mailboxes being transferred. - Remote PowerShell Connection
To run the required cmdlets from your local Windows PowerShell, establish a remote PowerShell session to Exchange Online. - Accepted Domain Configuration
Your on-premises organization must be an accepted domain in your Office 365 tenant for the cutover migration to function correctly. - RPC over HTTP (Outlook Anywhere)
Configure RPC over HTTP (Outlook Anywhere) on your on-premises Exchange server, as this is the protocol used by the migration service. Test the configuration using Microsoft’s Remote Connectivity Analyzer to ensure proper connectivity. - Disable Unified Messaging (UM)
Make sure Unified Messaging (UM) is disabled on the mailboxes before starting the migration, as it can interfere with mailbox transfer.
Step-by-Step Cutover Migration Using PowerShell
Connect to Exchange Online via PowerShell
Establish a connection to Exchange Online with the following commands:
$UserCredential = Get-Credential
$Session = New-PSSession -ConfigurationName Microsoft.Exchange -ConnectionUri https://outlook.office365.com/powershell-liveid/ -Credential $UserCredential -Authentication Basic -AllowRedirection
Import-PSSession $Session -DisableNameChecking
Creating a Migration Endpoint
A migration endpoint defines connection settings to your on-premises Exchange server. Run the following commands:
$Credentials = Get-Credential
$TSMA = Test-MigrationServerAvailability -ExchangeOutlookAnywhere -Autodiscover -EmailAddress administrator@xyz.com -Credentials $Credentials
New-MigrationEndpoint -ExchangeOutlookAnywhere -Name ExMigrationEndpoint -ConnectionSettings $TSMA.ConnectionSettings
Verify the endpoint:
Get-MigrationEndpoint ExMigrationEndpoint | Format-List EndpointType, ExchangeServer, UseAutoDiscover, Max*
Creating and Starting a Migration Batch
Create a migration batch using the endpoint. You can start it automatically with -AutoStart or manually with Start-MigrationBatch:
New-MigrationBatch -Name Batch1 -SourceEndpoint ExMigrationEndpoint -AutoStart
To verify if the batch has started, run the following:
Get-MigrationBatch -Identity Batch1 | Format-List Status
After migration is complete and MX records are updated to route emails to Office 365, remove the batch:
Remove-MigrationBatch -Identity Batch1
Post-Migration Tasks
- Verify that all mailboxes have migrated successfully.
- Update DNS records if required (MX, Autodiscover).
- Reconfigure Outlook profiles for users.
- Check mailbox permissions and accessibility in Office 365.
Best Practices for Cutover Migration
- Backup Mailboxes Before Migration: Ensure all mailboxes are backed up to prevent data loss in case of unforeseen issues.
- Test with a Small Batch First: Perform a pilot migration to validate the process and identify potential issues before migrating all users.
- Schedule During Off-Peak Hours: Minimize disruption to business operations by running migrations when network and user activity is low.
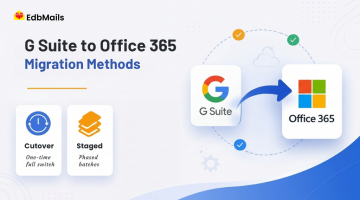
- Use Incremental Migration for Large Organizations: For organizations with many or large mailboxes, incremental migration reduces risk and ensures smoother transitions.
Advantages of Using PowerShell for Cutover Migration
- Automated Mailbox Transfers: Streamline the migration process by scripting batch operations, saving time and effort.
- Real-Time Monitoring: Track migration progress instantly and receive status updates for each mailbox or batch.
- Greater Control and Flexibility: Customize migration settings and workflows beyond what GUI tools allow.
- Error Handling and Dynamic Adjustments: Quickly respond to errors and modify the migration process without starting over.
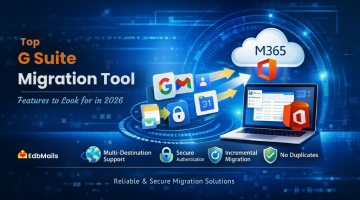
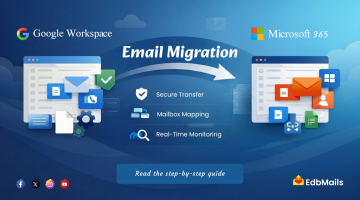
Safer and Reliable Alternative: EdbMails Exchange Server Migration
While PowerShell offers control and flexibility, managing endpoints, migration batches, and complex cmdlets can be challenging and error-prone, particularly for large organizations.
EdbMails Exchange Server Migration tool provides a secure, reliable, and user-friendly solution for mailbox migration, eliminating the need for complicated scripting:
- Safe and Secure – Guarantees 100% data integrity during migration.
- Supports Multiple Platforms – Migrate from Exchange, Office 365, OST, PST, IMAP, SharePoint, Teams, and more.
- Incremental and Granular Migration – Avoid duplicates and migrate selected mailboxes, folders, or individual items.
- Preserves Folder Hierarchy – Maintains mailbox structure, allowing users to resume work immediately.
- Zero Downtime – Ensures business operations continue without interruption.
- User-Friendly Interface – No PowerShell expertise required; ideal for IT teams of all sizes.
- Free Trial Available – Test the workflow and features before performing the full migration.
Conclusion
Cutover migration using PowerShell provides administrators with flexibility and control, but it often demands technical expertise, significant time, and careful planning. While it works well for smaller environments, larger organizations may face complexity, downtime, and risk of errors. To simplify the process and ensure a seamless transition to Office 365, EdbMails Exchange Server Migration tool offers a safer and more efficient alternative. With features like incremental migration, zero downtime, and a user-friendly interface, it helps businesses migrate confidently while keeping productivity intact.
See our other articles
Significant Enhancements in Exchange 2013 and Migration Strategies
Migrate from Legacy Exchange Servers to Exchange 2016
Migrate Exchange 2010 Mailboxes to Office 365 Using Cutover Migration