Organizations rely on Shared Mailboxes and Public Folders in Office 365 for different but complementary purposes. While both can be mail-enabled to receive emails, their functionality varies based on collaboration needs. A Shared Mailbox allows multiple team members to send, receive, and manage emails from a common address—ideal for customer support, sales, or HR teams. Public Folders, on the other hand, serve as centralized repositories where employees can store, organize, and access emails, calendars, contacts, or documents across departments.
Together, Shared Mailboxes and Public Folders act as company-wide collaboration tools that improve communication, streamline workflows, and ensure team members stay aligned. In this guide, we’ll explore the key concepts of Shared Mailboxes and Public Folders and show you how to create and manage them effectively in your Office 365 account.

What is a Shared Mailbox?
A Shared Mailbox in Office 365 is a collaborative mailbox that multiple users can access to read and send emails, manage calendars, and organize contacts. It does not require a separate username, password, or license in most cases and is added by an admin for team collaboration. A license is only needed if the mailbox exceeds 50 GB or advanced features such as archiving are enabled.
When is a Shared Mailbox advantageous?
Shared Mailboxes are highly beneficial when multiple team members need to access and manage emails, calendars, or contacts without requiring additional licenses. For example, instead of creating separate user mailboxes for design and marketing teams, which increases licensing costs, organizations can simply create a Shared Mailbox. This way, only individual users need licenses, not the mailbox itself—helping businesses reduce expenses.
Shared Mailboxes appear as additional mailboxes in Outlook and include features like a shared inbox, calendar, and contact list. They enable teams to:
- Reply to emails from a common address.
- Share and manage contacts or company-wide information.
- Schedule and track vacations or work shifts using a shared calendar.
This makes Shared Mailboxes an efficient and cost-effective option for improving collaboration and communication across teams.
How to create a Shared Mailbox in Office 365 admin center?
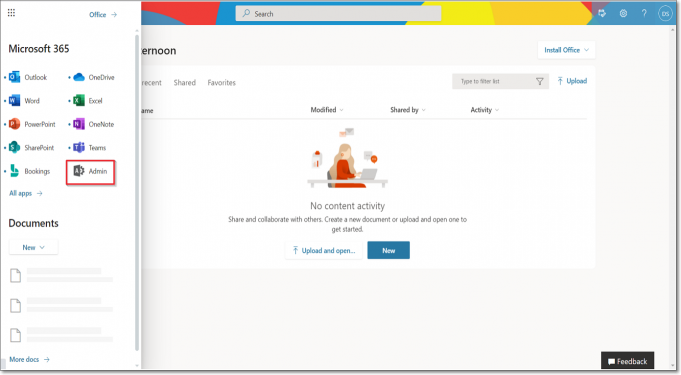
Step 1: Log in to your Office 365 account with the admin login credentials and click on the ‘Admin’ option in the left pane.
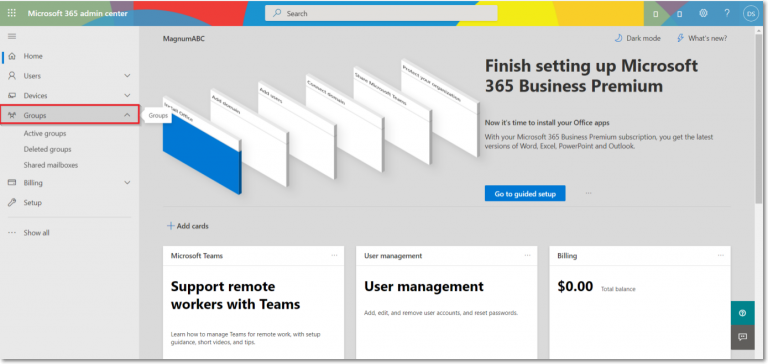
Step 2: In the Office 365 admin center, go to Groups and select Shared mailboxes under it.
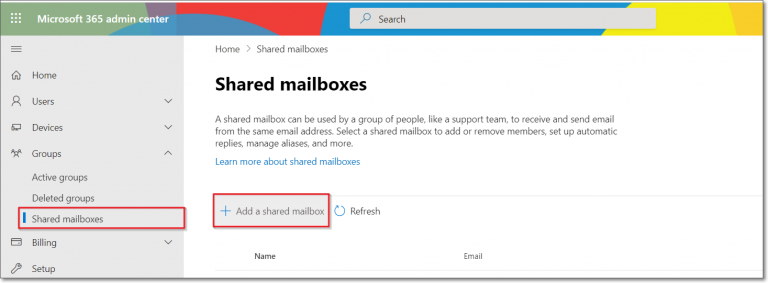
Step 3: In Shared mailboxes, click on the ‘Add a shared mailbox’ button.
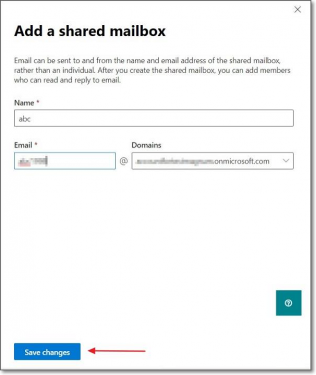
Step 4: After completing the above steps, you will get a window as shown below. Here you have to enter the name of the shared mailbox and email to create a Shared mailbox. Then click on the ‘Save changes’ button. After a few seconds, the Shared mailbox account will get created.
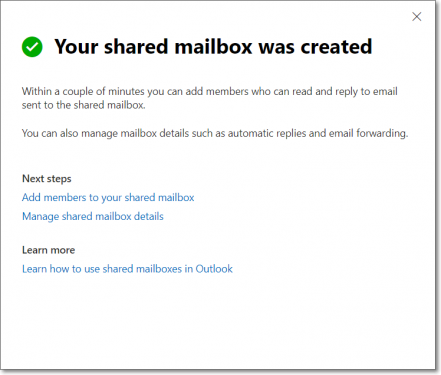
Step 5: After the creation of Shared mailbox, you will get a notification as shown below.
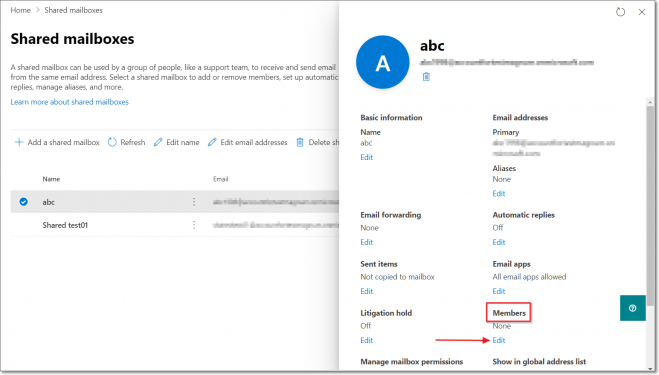
Step 6: Now you can add members to the Shared mailbox, so that all members of the Shared mailbox can access the data such as calendar, contacts, and other information. Click on the Shared mailbox account that you have created. You will get a window as shown below. Under members, click on the ‘Edit’ option.
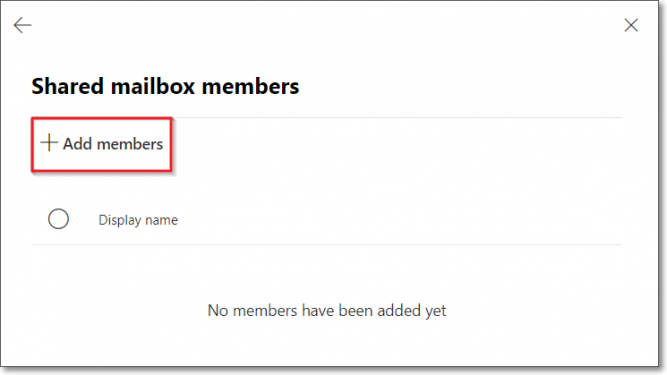
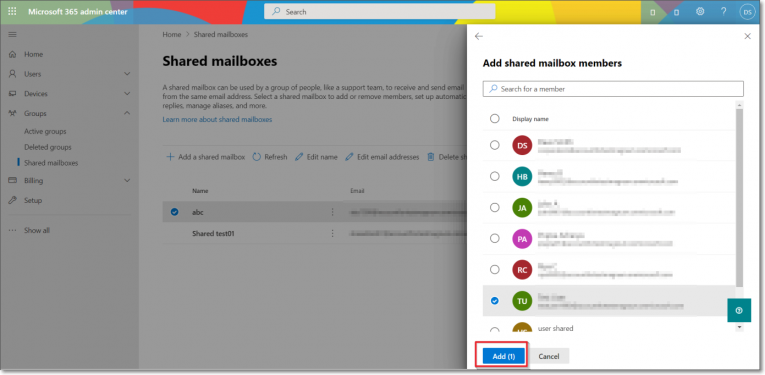
Step 7: Click on the ‘+Add members’ button
Step 8: Now choose members from the list and click on the ‘Add’ button. The selected members will be added to the shared mailbox.
How to create a Shared Mailbox in the Exchange admin center
Step 1: Login to Office 365 account and click the ‘Admin’ button.
Step 2: Now select ‘Exchange’.

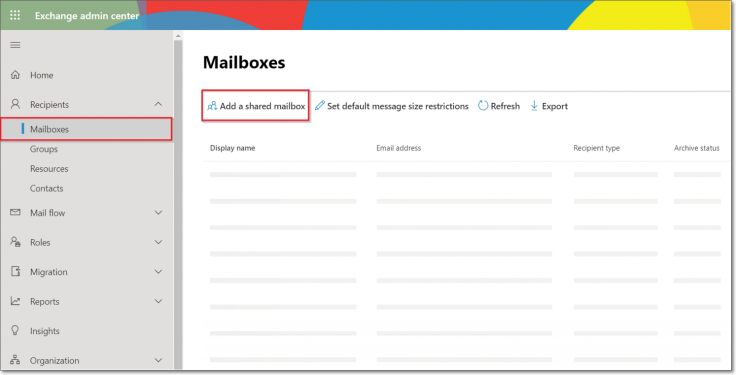
Step 3: Under Recipients, go to Mailboxes and then click on ‘Add a shared mailbox’.
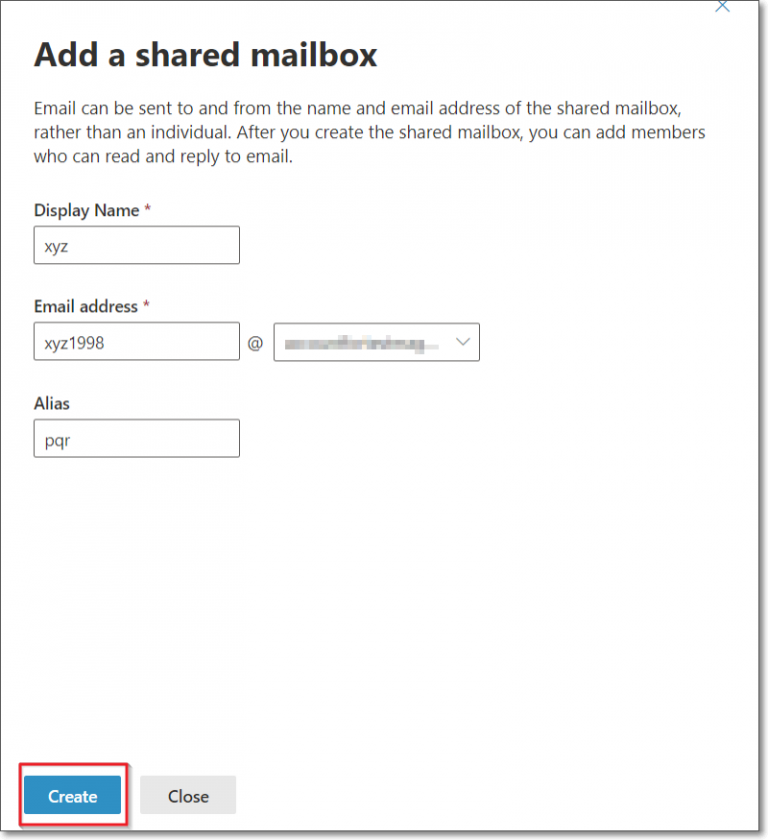
Step 4: Here enter the required data and click on the ‘Create’ button.
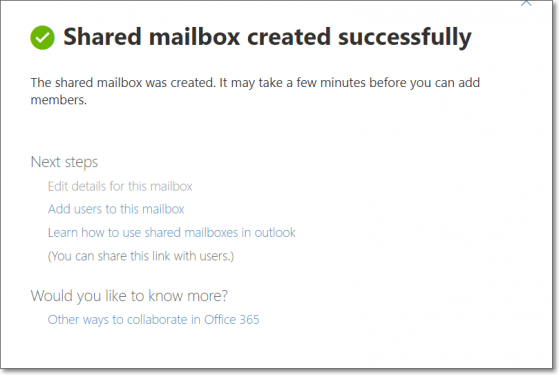
Step 5: You will get notification as shown below.
What are Public Folders?

Public Folders in Office 365 act as shared containers where teams can store, organize, and access information collectively. They are designed for easy collaboration, allowing employees to share emails, files, and resources in a centralized location. Unlike a Shared Mailbox, a Public Folder does not have a dedicated email address but can still be mail-enabled if needed.
Key Features of Public Folders:
- Contacts – Centralized contact lists accessible by all members.
- Calendar Items – Shared calendars for team schedules and events.
- Messages – Store and organize emails for group access.
- Journal Entries & Notes – Track activities and maintain shared notes.
- Custom Attributes & Templates – Tailored fields and templates for business needs.
Administrators can define a Public Folder hierarchy and delegate ownership of specific folders to reduce administrative overhead. These delegated admins can then manage permissions directly from Outlook, making Public Folders simple to use and maintain.
👉 Public Folders are especially useful for teams that need a central repository of information without requiring multiple mailboxes, helping organizations improve collaboration and reduce redundancy.
How to create a Public Folder in the Exchange admin center?
Step 1: Login to the Office 365 admin account.
Step 2: Click the ‘Admin’ button to open the Office 365 admin center.
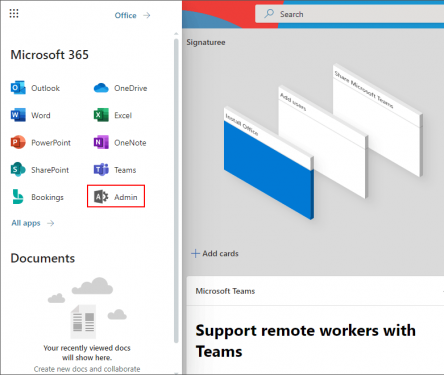
Step 3: In Office 365 admin center, select ‘Exchange’ to open the Exchange admin center.

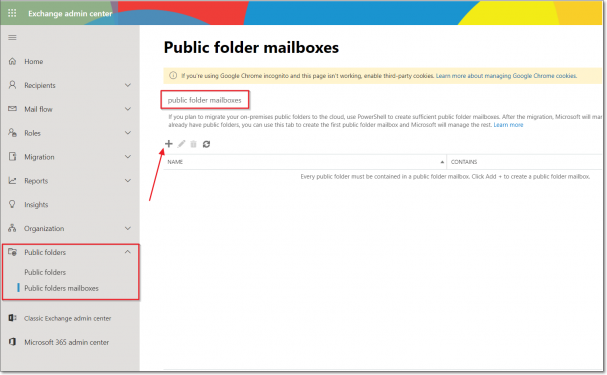
Step 4: Go to ‘Public Folders’ which is present on the left pane. And select ‘Public folders mailbox’.
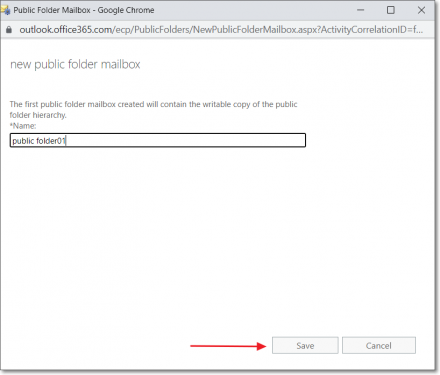
Step 5: Enter the name and click on the ‘Save’ Button.
Step 6: Then you will get a message as shown below. Once you have created a public folder mailbox, you can add public folders and assign users to it.

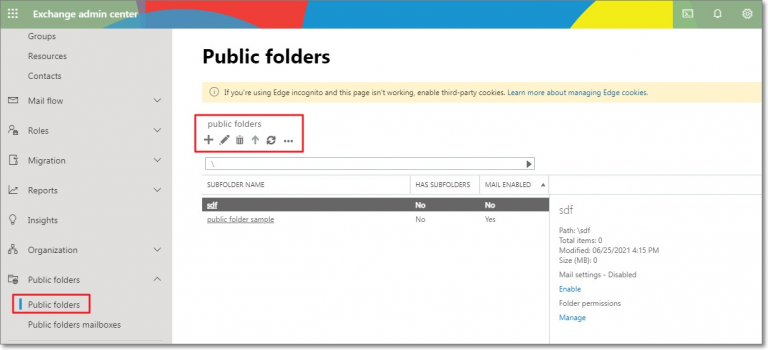
Step 7: To create a new public folder, click on the plus ‘+’ sign. To edit, click on the pencil icon. To add users and set ‘Root Permissions’ to the Public folder, click on the three dots ‘…’ button. The public folders will be displayed in your Outlook mailbox under folders once it is created.
Office 365 Public Folder to Shared Mailbox Migration with EdbMails
Migrating from Office 365 Public Folders to Shared Mailboxes can be a complex task, especially when dealing with large volumes of data or intricate folder structures. Traditional methods often require technical expertise and can be time-consuming. However, EdbMails Office 365 Migration Tool simplifies this process.
EdbMails provides a secure and efficient migration tool that automates the transfer of Public Folder data to Shared Mailboxes. The software ensures 100% data integrity, preserves folder hierarchies, and supports incremental migration, reducing downtime and minimizing the risk of data loss. With its user-friendly interface, EdbMails enables organizations to perform migrations without the need for complex configurations or third-party tools.
By utilizing EdbMails, businesses can enhance collaboration, optimize licensing costs, and ensure a seamless transition to a more efficient email management system.
Shared Mailbox vs Public Folder: Key Differences and Use Cases
| Feature / Aspect | Shared Mailbox | Public Folder |
| Purpose | Centralized mailbox for multiple users to send/receive emails and share calendars | Central repository to store and organize emails, contacts, calendars, and documents for team access |
| Email Address | Has a dedicated email address (e.g., support@company.com) | Does not have a dedicated email address unless mail-enabled |
| Access | Assigned to specific users by admin | Accessible to users based on permissions set in the folder hierarchy |
| License Requirement | Not required for mailbox ≤50 GB; required only for archiving or larger mailboxes | No license required; part of Office 365 subscription |
| Mailbox Features | Inbox, Calendar, Contacts, Tasks | Emails, Contacts, Calendar Items, Notes, Journal Entries, Custom Attributes, Templates |
| Best Use Case | Departments needing group email access (support, sales, HR) | Teams needing centralized storage and collaboration for shared resources |
| Visibility | Appears as an additional mailbox in users’ Outlook | Appears in users’ Outlook under Favorites or directly under Public Folders |
| Administration | Managed via Office 365 Admin Center | Admin can define folder hierarchy and delegate permissions to subfolders |
👉🏻 For a detailed step-by-step guide on migrating Office 365 Public Folders to Shared Mailboxes using EdbMails, please visit the official migration page: EdbMails Office 365 Public Folder to Shared Mailbox Migration
Conclusion
Shared Mailboxes and Public Folders in Office 365 help organizations collaborate efficiently by providing centralized access to emails, calendars, contacts, and other resources. Shared Mailboxes are ideal for group communication, while Public Folders serve as a team-wide repository for information. Using EdbMails, businesses can securely migrate data between Public Folders and Shared Mailboxes while preserving folder structures and minimizing downtime. This ensures smooth collaboration, reduced licensing costs, and streamlined management across teams.
See More
How to add a Shared mailbox and Public folder in Outlook?
Shared Mailboxes in Exchange Servers
Public Folders in Exchange Server 2016 and Migration Scenarios