Office 365 has become the go-to platform for businesses thanks to its rich features for collaboration, communication, and productivity. However, enterprises that plan to move from one Office 365 tenant to another often face challenges in preparing, planning, and executing a seamless migration. While Microsoft provides native methods for data transfer, these approaches come with limitations such as bandwidth constraints, complex setup, and risks of incomplete migration.
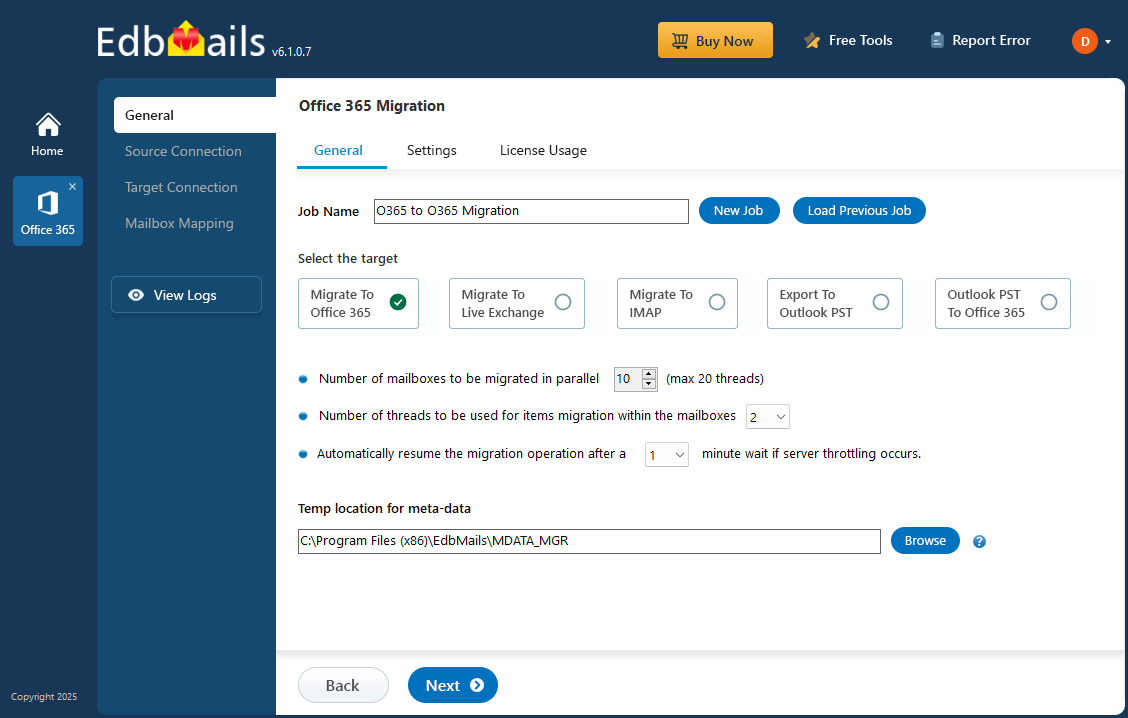
For organizations looking beyond native solutions, choosing the right third-party migration tool becomes crucial, especially when the market is filled with multiple options. EdbMails Office 365 Migration tool stands out by offering a reliable and simplified way to migrate mailboxes, calendars, contacts, and other critical data.

In this article, we provide a detailed step-by-step walkthrough of the Office 365 migration process using EdbMails. We will also highlight the importance of pre-migration configurations such as assigning impersonation rights and disabling security defaults—two essential prerequisites that ensure smooth and uninterrupted migration or backup operations.
1. Download the software from EdbMails website
2. Now to install the EdbMails application, follow the steps mentioned below.
- Double click the EdbMails setup (EdbMailsSetup.exe) to install the application
- Click the ‘Next’ button.

- Click on ‘I Agree’ option to accept the license agreement.

- You can see the installation process as shown in the image below.

3. If you are planning to migrate to another Office 365 tenant
- Create a new Office 365 account by visiting www.office.com.
- Choose a subscription plan that includes Exchange Online, as it is required for mailbox migration.

- Follow the guided steps to complete the account creation process.
- For a detailed, step-by-step signup guide, refer to Microsoft’s official documentation: Sign up for Microsoft 365 Business.
4. Setting Impersonation Rights in Office 365 Using the GUI
To perform a smooth migration operation with EdbMails, it is essential to assign impersonation rights.
Impersonation rights allow a single service account to access multiple user mailboxes. This permission is critical for migration tools because it enables centralized access to emails, calendars, and other resources without needing individual login credentials. Without these rights, the migration process may fail or result in incomplete data transfer.
Steps to set impersonation rights in Office 365 using the GUI:
- Sign in to your Office 365 account with Global Administrator credentials.
- From the dashboard, click on Admin to open the Microsoft 365 Admin Center.

- In the left pane, select Exchange to open the Exchange Admin Center (EAC).

- Choose Classic Exchange Admin Center for advanced settings.

- Navigate to Permissions > Admin Roles and double-click on Discovery Management.

- Under the Roles section, click the “+” icon and add ApplicationImpersonation. Under the Members section, click the “+” icon, add the administrator account, and then click Save.

👉 For detailed steps on setting up Exchange impersonation rights, refer to the official guide: Set Impersonation Rights in Exchange.
5. Disabling Security Defaults in Office 365
By default, Microsoft enables security defaults to protect user accounts from threats by blocking legacy authentication and restricting connections from third-party applications. However, during migration with EdbMails, these settings may prevent the tool from authenticating and result in the error:
‘Unable to connect to the server’.
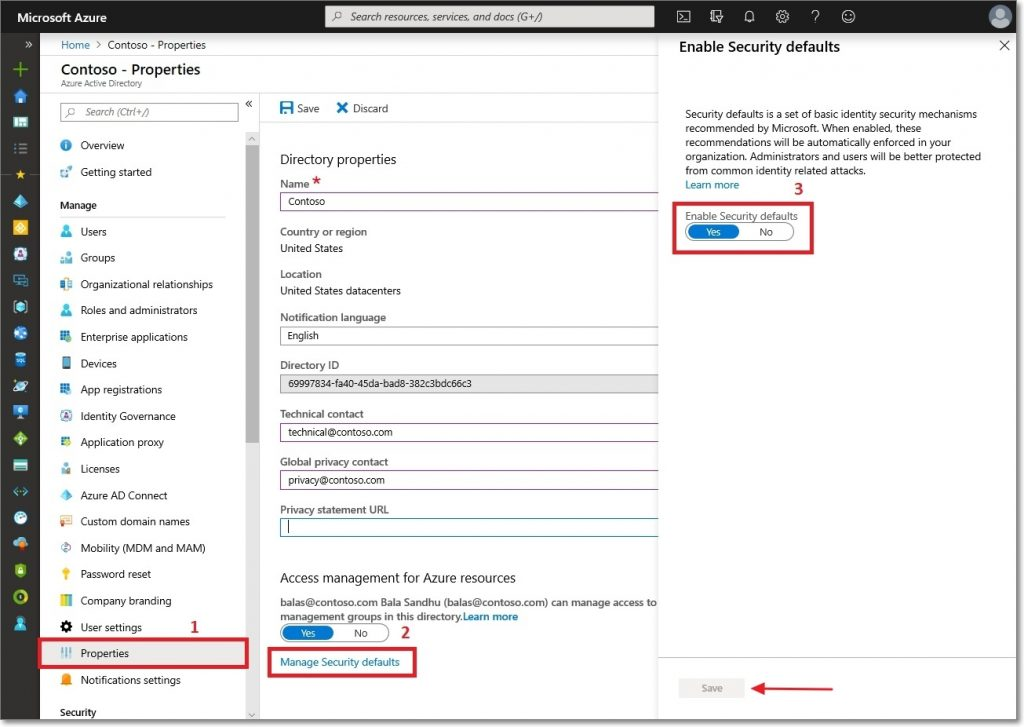
To proceed with the migration, you need to temporarily disable security defaults in your Office 365 admin account. Once the migration is successfully completed, you can re-enable them for enhanced security.
Steps to disable security defaults in Office 365:
- Login to the Office 365 admin account and click on ‘Azure Active Directory’ option.

- Go to ‘Azure Active Directory’ and select ‘Properties’.

- Click on the ‘Manage Security defaults’ link from the bottom and set it as ‘No’ to disable the security defaults and click the ‘Save’ button.

These are the essential pre-migration requirements you must complete before using EdbMails. Without configuring them, the tool will be unable to connect to your Office 365 admin account, which may prevent successful migration of data to or from the Office 365 server.
Know about EdbMails Migration tools

EdbMails is a comprehensive solution for migrating and backing up your email data across different platforms. It securely transfers all mailbox contents from the source to the target server with complete data integrity and minimal effort. Whether you need to migrate or back up Offline Exchange, Live Exchange, Office 365, SharePoint, OneDrive, Microsoft Teams, Office 365 Groups, Global Address Lists (GALs), Exchange OST, Outlook PST, or IMAP email accounts, EdbMails provides seamless support.
The tool is designed with advanced features such as incremental migration (to avoid duplicate items), zero downtime (users can continue working during the migration), and automatic mailbox mapping between the source and destination. It also preserves the original folder hierarchy, ensures granular migration (migrate specific items as needed), and supports large mailbox migration without data loss.
With its simple interface and step-by-step guidance, EdbMails makes complex migration and backup tasks straightforward, helping organizations save time, reduce risk, and achieve a smooth transition.
👉 To know more about all the products of EdbMails, please visit: EdbMails Products
Conclusion
Configuring pre-migration requirements such as impersonation rights and disabling security defaults is essential for a smooth migration with EdbMails. These steps ensure the tool can connect to Office 365 without errors and transfer data reliably.
EdbMails simplifies complex migration tasks with features like incremental migration, zero downtime, automatic mailbox mapping, and full data integrity. By preparing your environment in advance, you can ensure a seamless and secure migration experience.
See More
How to migrate Hotmail data to Office 365 using EdbMails?
How to perform OST to Exchange migration using EdbMails?


