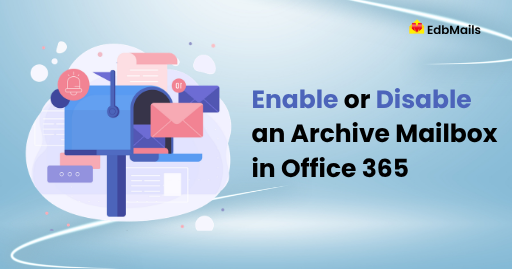
Office 365 provides additional mailbox storage space with the archive feature. It serves as an extra storage location where users can store messages. You can enable or disable it either from the Exchange Admin Center (EAC) or by using PowerShell commands.
Enable archive mailbox using Exchange admin center:

- Sign in to your Office 365 account.
- Click the app launcher icon and then select Admin.
- Go to Admin centers and select Exchange.
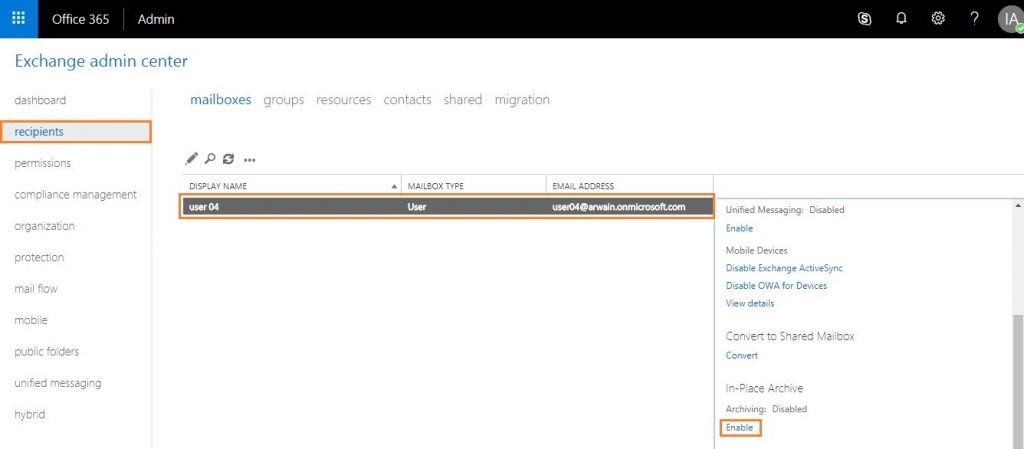
- Click Recipients and then Mailboxes.
- Select the mailbox you want to enable and choose Enable under In-Place Archive.
Disable archive mailbox using Exchange admin center:
- Sign in to your Office 365 account.
- Click the app launcher icon and then select Admin.
- Go to Admin centers and select Exchange.
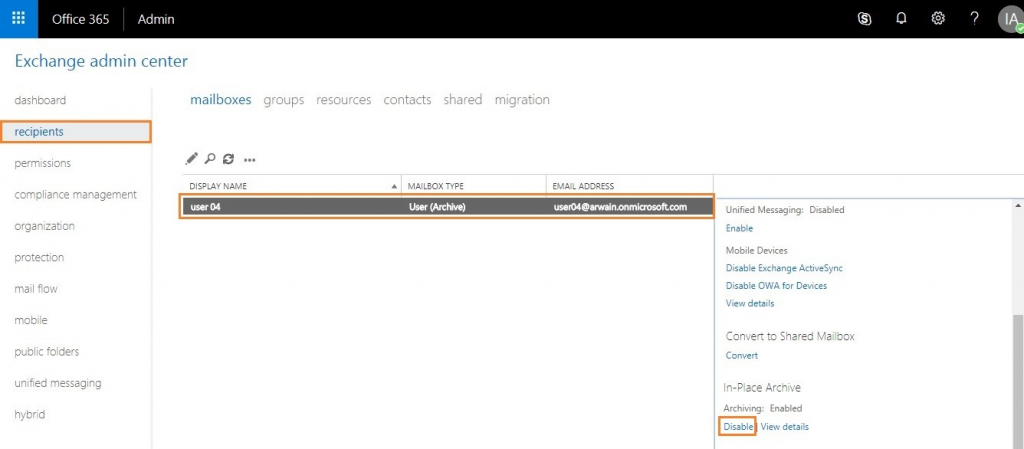
- Click Recipients and then Mailboxes.
- Select the mailbox you want to disable and choose Disable under In-Place Archive.
Enable archive mailbox using Windows PowerShell:
- Connect to Exchange Online with Windows PowerShell.
Run the following command:
Enable-Mailbox -Identity “user04” –Archive
This enables the archive for the mailbox of user04.
To enable an archive for all user mailboxes, run:
Get-Mailbox -Filter {ArchiveStatus -Eq “None” -AND RecipientTypeDetails -eq “UserMailbox”} | Enable-Mailbox –Archive
Disable archive mailbox using Windows PowerShell:
- Connect to Exchange Online with Windows PowerShell.
- Run the following command:
Disable-Mailbox -Identity “user04” -Archive
Note: If you need to migrate EDB, OST, or PST files to Office 365 or Live Exchange Server, you can use EdbMails Office 365 migration tool, which ensures a scalable and high-performance migration with complete data integrity.
Read more: