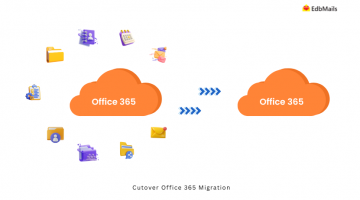
An Office 365 tenant mailbox migration refers to transferring mailbox data from one Microsoft 365 tenant to another. This process is common in scenarios such as mergers, acquisitions, company rebranding, or organizational restructuring. The goal is to ensure that all user emails, contacts, calendars, tasks, and associated settings are securely moved to the new environment without disrupting business communication.
Unlike regular mailbox moves within the same tenant, a cross-tenant migration involves domain verification, reconfiguring user accounts, and updating records to maintain email flow. While Microsoft offers native methods, many organizations rely on specialized third-party tools to streamline the process, reduce downtime, and eliminate data loss risks.

When and why perform an Office 365 tenant mailbox migration?
You may need to perform a tenant-to-tenant migration for reasons such as:
- Mergers and acquisitions – When two organizations merge, their Microsoft 365 environments need to be consolidated for unified communication.
- Rebranding or restructuring – Changing the company’s domain or organizational setup requires moving mailboxes to a newly configured tenant.
- Regulatory and compliance requirements – Legal or security standards may require data to be managed in a specific tenant.
- Productivity optimization – Consolidating tenants can simplify administration, reduce licensing overhead, and create a consistent user experience.
Regardless of the reason, proper planning ensures that business operations continue without disruptions during the migration.
How to plan for a migration
A smooth migration begins with preparation. Skipping this phase can lead to failed mailbox moves, downtime, or compliance breaches.
1. Assess the current environment
List all mailboxes, shared mailboxes, distribution groups, and public folders that need to be moved. Record mailbox sizes, retention policies, and permissions.
2. Check licensing and storage
Verify that the target tenant has the required licenses and adequate mailbox storage for all incoming data.
3. Prepare domains for verification
Add the source domain to the target tenant’s Microsoft 365 admin center and create DNS TXT records for verification. Allow up to 72 hours for these changes to propagate.
4. Plan DNS and MX record changes
Update Time to Live (TTL) values to a lower setting before migration to speed up DNS updates and reduce mail flow disruption.
5. Communicate with users
Inform end users about migration timelines, expected changes, and required actions. Provide FAQs or guides to help them adapt to the new setup.
Migrating mailboxes with Microsoft native tools
Microsoft offers native options for tenant-to-tenant mailbox migration, including PowerShell scripting and cross-tenant mailbox migration features. These tools can handle smaller migration workloads or environments where administrators are comfortable with manual configurations.
However, native tools require extensive setup, have limited automation, and can become time-consuming for large-scale moves. They also lack detailed reporting and advanced filtering options, which makes troubleshooting and selective migration more difficult.
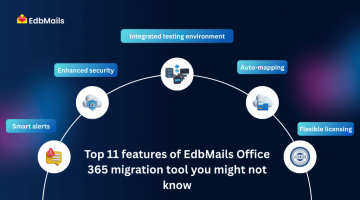
To overcome these challenges, many organizations choose specialized third-party solutions such as EdbMails Office 365 migration tool. EdbMails automates complex migration tasks, supports large mailbox volumes, preserves folder hierarchy, and ensures zero downtime during the transition. Its intuitive interface allows both technical and non-technical users to manage tenant-to-tenant migrations efficiently without PowerShell scripting.
Steps to complete a successful mailbox migration with EdbMails
EdbMails simplifies Office 365 tenant-to-tenant migrations with an intuitive interface, advanced filters, and real-time progress tracking. Follow these steps for a smooth migration:
Step 1: Download and install the EdbMails application on your system.
Step 2: Select the Office 365 to Office 365 migration option from the main dashboard.
Step 3: Connect to the source Office 365 server using an administrator account with the necessary permissions.
Step 4: Connect to the target Office 365 server and verify authentication.
Step 5: Map the source mailboxes to their corresponding target mailboxes automatically or manually.
Step 6: Start the Office 365 to Office 365 migration operation and monitor the progress until completion.
EdbMails ensures that mailbox data, including emails, contacts, calendars, tasks, and folder structure, is migrated securely without downtime or data loss.
👉 A detailed guide for Office 365 tenant-to-tenant migration

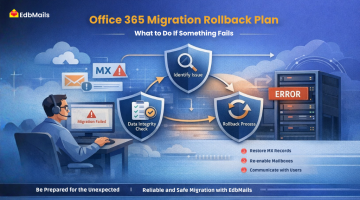
Post-migration steps
Once the migration is complete, ensure the following actions are taken:
- Verify email flow – Send and receive test emails to confirm that MX records are updated and functioning.
- Reconfigure Outlook profiles – Guide users in recreating or updating their Outlook profiles if needed.
- Check mailbox permissions – Ensure that shared access, send-as permissions, and group memberships are intact.
- Decommission the old tenant – After confirming that all required data has been moved, retire the old environment securely.
- Provide training and support – Offer user assistance for navigating the new tenant and resolving post-migration issues.
Conclusion
Migrating mailboxes to a new Office 365 tenant is a strategic operation that requires planning, precision, and the right tools. While Microsoft’s native methods work in certain scenarios, they can be time-intensive and technically challenging for large-scale migrations.
Using a purpose-built solution like EdbMails ensures that mailbox data is transferred quickly, securely, and without downtime. With proper preparation, clear communication, and post-migration validation, organizations can achieve a seamless transition that maintains productivity and protects critical business data.